FYI.

This story is over 5 years old.

Travel

DIY: 3 Tips For Photographing The Milky Way

Timelapse photography pro, Michael Shainblum, offers tips on how to take photos of the cosmos.

Living in New York, we sometimes feel deprived of the ability to stare up at a star-studded sky. The light pollution can be a downer for active space-gazers, but thankfully we can vicariously experience the cosmos' stunning power with the help of photographers like Michael Shainblum—the San Diego-based timelapse pro whose gorgeous shots of California we covered in a recent documentary.  Yesterday, Shainblum sent us a newly released photo of the Milky Way captured from Santa Barbara in 2012 (above), and we asked him if he had any tips for shooting the Milky Way, and he replied with the following:  
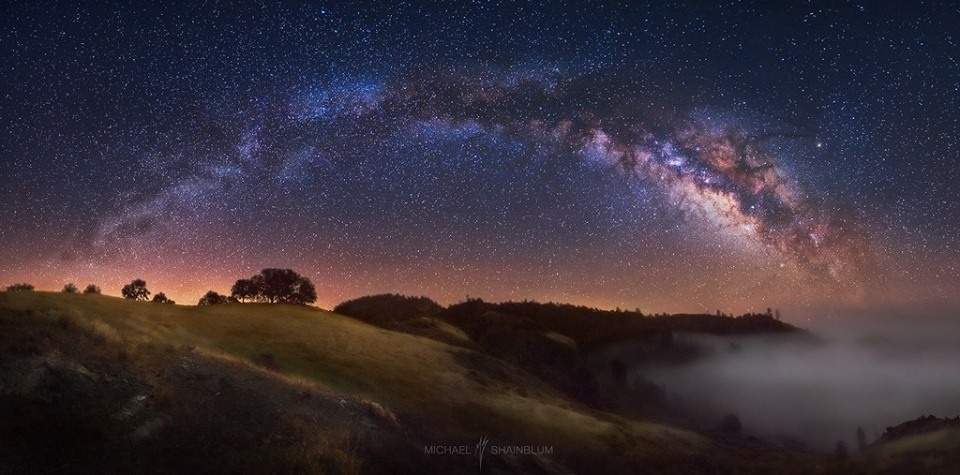
"Yosemite Dreamscape" via
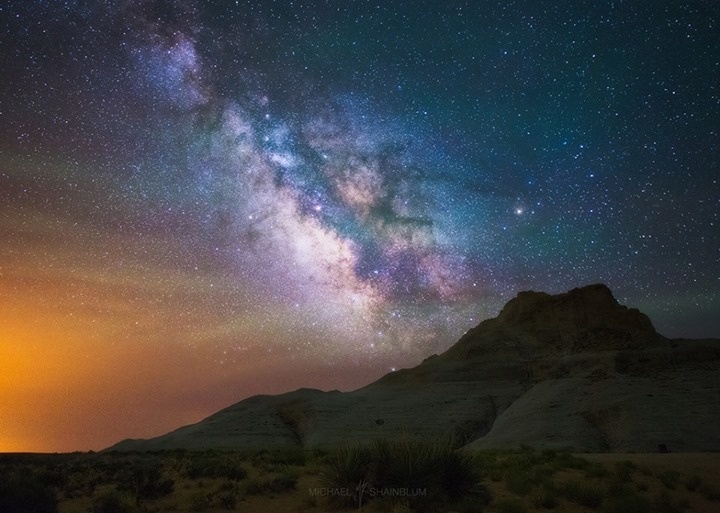
Tip #1: Preparation: 

Before shooting the Milky Way, it's important to know where the Milky Way will be and how it will be scene at that time. The Milky Way is visible only during months around summertime. The Milky Way's rising and setting times all depends on what month it is. To calculate this I use iPhone apps such as Starwalk or Photopills. This allows me to calculate where the Milky Way will rise and set, and when the best time is to shoot it. These apps also allow me to check the Moon Phase to make sure the sky will not be washed out. The best dates to shoot the Milky Way around around the New Moon. Its also important to know the weather conditions and check on the weather on the location that you like to shoot at regularly. One of the biggest elements to consider is light pollution. National parks can usually be good places to photograph the Milky Way. You should probably be at least an hour and a half to two hours out of any major city and that will allow you to see the stars a lot better.  "Desert Dreams" via

Tip #2: Gear: 

Gear wise, I use a Canon 6D, because it has great performance under low light and allows me to use high ISO's without getting too much grain. This is not the only camera that works for Astro Photography it is just the one I prefer. For most Milky Way shots are done from 14 to 24mm this allows us to see a good portion of the galactic core while still including part of the landscape or foreground we are in. It's good to find a lens that goes down to f/2.8 so you can let in as much light as possible. I recommend checking out the Rokinon 14mm 2.8 Lens if you are on a budget the lens is very good for night photographs and produces sharp images and sharp edges of my Milky Way imagery. If you are not on a budget, a great lens is the 14-24mm 2.8 from Nikon, and it is also extremely sharp at night. Canon also makes a good variety of quality lenses for night photography. For other gear I like to always have a sturdy tripod, a shutter cable release, and a bright headlamp. "Into The Night" via

Tip #3: Taking the Photo: 

My images are always shot in .RAW and the white balance won't matter if you are shooting in .RAW because you can change it later—but I use Tungsten because I prefer a blueish look to my image. One of the things that most people ask me about is focusing my images in order to get sharp looking stars. Using infinity on your lens doesn't always work because every lens is different. I would say the most accurate way to focus your images is to set your camera on live view, (make the screen as bright as it can go) zoom in to 10x magnification on your screen and try to either focus on a light far in the distance or try and focus on some of the brightest stars in the sky. This might take a few tries to find a star that is bright enough but this technique gives you the sharpest images. When taking a photo, the standard and widely used exposure combination for shooting the Milky Way is 30 seconds @ f/2.8 ISO 3200, and the reason the ISO is so high and the F-Stop is so low is because we want to let in the most amount of light as we possibly can. If you are using a Canon 6D you can sometimes bring the ISO up to 6400 without too much noise. If you find that you are shooting photos at 20-24mm or more zoomed in, you might need to decrease the shutter speed to make the stars blur less. For this I would recommend 15-20 seconds instead of 30. If you are a more advanced Astro Photographer and you like to do exposure blending, try exposing for 1-5 minutes for the foreground with your shutter cable and mix that in with the shot of the Milky Way to get both the foreground and Milky Way exposed.  There are a million ways to shoot the Milky Way but these are the tips I used the most when I first began shooting Astro Photography. Good luck! "Tree of Life" via For more on Michael Shainblum, visit his Facebook page. You can also purchase his work here And re-visit our documentary on the photographer below:  Related:  Timelapse Video Of Emerging Metropolis Offers Warm "Welcome to Doha" [Video] Stunning Timelapse Sheds New Light On California Space Photographer Explains How To Shoot The Milky Way In Light-Polluted Skies